Sunday, December 18, 2011

Santa Run

 Every year Santa comes to visit the kids in the township riding on a fire truck.  They blow the horn as they drive through the neighborhood.  They give kids candy canes but they also stop by and give some children gifts.  Santa hands each child their gift personally.  The secret to who gets gifts is if you take a wrapped marked gift to the station along with a donation then the child/children at your residence receives the gift you dropped off.  I think it is a nice idea.  The first picture is a picture of my daughter's fiance and his neice going over to Santa to get her gift.  She is 2 and was very excited to see Santa.  The second picture is Eli meeting Santa for the first time.  He just took his time to check him out.  At 1, he was not too excited but I am sure as he gets older, he will get more and more excited.


Tomorrow I will post another project.  Today we are going to the family Christmas party.  Santa will be showing up there also.  But today, he will have to sit on his lap to get his gift.  So we will see how that goes.


Enjoy the day!

Saturday, December 17, 2011

A Quick and Easy Gift

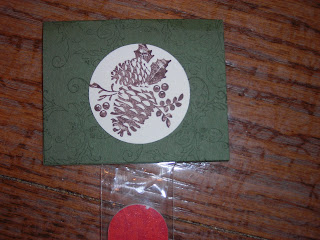
Last month I went to another Demo's downline meeting and we had the opportunity to make a number of projects to take back to show our customers.  This is one of the quick but really cute and easy gifts to give someone.  This is a great way to present an inexpensive item to someone.  By taking a little time to add embellishments to the packaging, it makes it a little more special.  


This is a nail file and I bought a number of them for a dollar a piece on sale  on Black Friday.  All we did was to place them in the cello bags which can be found in the Holiday Mini and make a cute topper to place at the open end of the bag.  I am going to make them for the ladies at my Grandson's daycare center.  


In the second picture, I took a close up picture of the topper.  This topper did not take a lot of time but you can make the topper as simple or as fancy as you wish.  This just gives you the idea of how you can take something very simple and by ]taking some time to add special packaging, it makes the gift more special and unique.   Enjoy the day!

Thursday, December 15, 2011

Clearance Rack Blitz

Check this promotion out!!!  A large number of retired items have been added to the Clearance Rack Blitz.  There are a large number of the old style of punches that are available as well as DSP, ribbons, and more.  Do not hesitate on ordering products from this sale.  Once the items have been sold out , they are gone forever.  The only way to order these items is my On-Line Store or a demonstrator order.  Be sure to check out the following information.

Dates: December 15, 2011-January 5, 2012
Details:
Nearly 200 new Clearance Rack items are being added to the Online Store at discounts up to 80 percent off retail--while supplies last!
Things to Remember
  • Only demonstrator and online orders qualify for this promotion. Orders can include non-Clearance Rack items, as well.
  • The Clearance Rack Blitz includes old-body style punches.
  • There is no minimum purchase required to participate in this promotion.
  • Qualifying Clearance Rack orders are eligible for hostess benefits/Stampin' Rewards.
  • Demonstrators will receive instant income on all Clearance Rack purchases made through the Online Store: DBWS subscribers will receive 20 percent and non-DBWS subscribers will receive 10 percent.
  • Following the Clearance Rack Blitz sales period, some blitz items may remain in the clearance rack; others may be removed and reappear at an undesignated time in the future.
  • Clearance Rack Blitz items are only available while supplies last. There are no refunds or exchanges on Clearance Rack items.
  • You may view Clearance Rack Blitz items in the Online Store.
  • Deadlines:Phone:
    • Thursday, January 5, 2012; 6:50 PM (MT)
    • OEX and Online Store: Thursday, January 5, 2012; 11:50 PM (MT)

Tuesday, December 13, 2011

The Wedding Invites

Well, I can finally tell you who these wedding invitations, favors, favor boxes, ect. are for.  They are for my daughter who is getting married in February.  We all like him and are very happy that they found each other and are getting married.  I have been working feverishly the last few months to get everything done.


She is having a small wedding which has a more vintage feel to it.  Her gown is Ivory and her Matron of Honor will be wearing Black.  The wedding is going to be done in Black and Ivory.  There will not be an accent color used but will be clean, simple and elegant.  So when coming up with  the invitation, I needed to convey the same elements of clean, simple, and elegant to the invite.

I wanted to post the invite but I promised my daughter that I would not show their information if she would allow me to post it on my blog.  That is why I took pictures that only show the design and not the wording.  

The supplies that I used for this project were:
STAMP SET:  Lovely Letters
PAPER:  Very Vanilla, Basic Black
INK:  Versamark
ACCESSORIES:  Scallop Trim Border Punch, Decorative Label Punch, Basic Black Satin Ribbon, Decor Wheel, Black Embossing Powder, Sticky Strip

I typed off and ran off the wording of the invitations, the response cards, and the directions to the reception.  There was no stamping on those items except the design.  All in all I was very happy with how they turned out .  My daughter and her fiance seemed to be happy with them also. I hope that you like them also.  Well another busy day.  Today I am starting my Christmas cards.  I put everything on hold to finish these projects.  So now I am ready to jump in with everyone else to get overwhelmed by the Christmas rush.  Enjoy your day!

Monday, December 12, 2011

It Was A Merry Birthday!

Eli turned 1 yesterday!  OF course we had a small birthday party for him.  It was family and a few friends.  Lori and her husband made all the food which was a Chili Bar (mmm good) but everything was held at our house.  Where they live right now,  is a small place.  So we had it our place where there was more room.  We had such a nice time and it was so much fun to see him open his gifts.  The highlight of the day was (of course) the traditional first time eating of the birthday cake.  I included a before and after picture.  So how do you think he did!


Tomorrow I will be posting the wedding invitations that I have been working on.  I gave them to the couple yesterday and they really seemed to like them.  More information on that tomorrow.  Enjoy the day!
Mmmmm.  That cake was good!

Tuesday, December 6, 2011

Sounding Joy

This is a card that I received Saturday from my upline, Kim.  This quick and easy card would make a nice card for any one to receive for Christmas.  But I got my card to congratulate me for being in the top 5 of sales for the month of October.  


The supplies that she used for this card were:


STAMP SET:  Sounding Joy
PAPER:  Whisper White, Cherry Cobbler
INK:  Cherry Cobbler
ACCESSORIES:  Snowburst Embossing Folder, Big Shot


I am off for another busy day.  Today I need to finish my daughter's wedding invitations.  I can not believe that the wedding will be here in two months. Wow!  After I finish the invitation,  I willpost a picture of everything I made for the wedding.  So far I am very pleased how the set has turned out.  Enjoy the day!

Saturday, December 3, 2011

A Vintage Bridal Shower


Today was a very a very special day.  It was my daughter's Bridal Shower!  That is who I have been making all of these projects for.  She is getting married in February and 

 today we had her shower.  Her sister planned and hosted the shower and I made everything for it. I designed the invitations, thank you notes, favor boxes ( filled with Oreo Truffles- her favorite) and the post it notepad.  Everyone felt they were very elegant.  

Her gown is ivory and the maid of honor's dress is black so it is a very formal looking wedding.  It also has a vintage feel to it.  So I used the Vintage Wallpaper Embossing Folder to make the invitations and favors.
 The cake was also made to have a vintage feel to it.  The icing was ivory and then there was black piping around the sides.  It was beautiful!
 Here is a picture of the set up of the favor boxes which were made with the Favor Box Sizzix die and Big Shot.  They were filled with the Oreo Truffles.  Everyone loved, loved, loved them.  You can also see the post it memo pads that were the favors.  I used the smallest of the 1/2 round Pearl Jewels that SU  sells.
Here is a better picture of what we put at the place settings.  It really looked gorgeous!  It looked so much better than what we had envisioned.
Chocolate covered strawberries that the Groom to Be' s mother made.  Delicious!

What a wonderful day!  Enjoy yours!

 What a beautiful setting for a shower!

Thursday, December 1, 2011

A Quick and Easy Gift Card Holder

Here is a quick and easy gift card holder to make.  You can find the directions at Stamping 411.  The supplies that I used for this project were:


STAMP SETS: Holiday Bingo Bits, Teeny Tiny Messages
PAPER:  Candy Lane DSP (printed from MDS), Wild Wasabi, Real Red, Bashful Blue, Whisper White
INK:  Wild Wasabi, Basic Black
ACCESSORIES:  Rhinestone Jewels, Modern Label Punch, Word Window Punch, Scallop Circle Punch, 1-1/4" Circle Punch, 1-3/8" Circle Punch, Two Tags Sizzix Die, Big Shot, Wild Wasabi, Real Red, Bashful BLue and Pink Pirouette Markers


The DSP that I used for this gift card came from a My Digital Studio download that I have on my MDS. I printed it out onto cardstock and used it for this card.  That is what is so great about having MDS.  If there is DSP that you like and it retires, you can still have that DSP by printing it from using the MDS program when you are unable to purchase it.


It is a beautiful day here and I got out early to do some Christmas shopping but now it is back to the grindstone so I can finish the wedding invites that I am making for a very special couple.  Enjoy the day!

Sunday, November 27, 2011

The Last Card from The Last Chance Card Buffet

This is the final card that you have to choose from for the Last Chance Buffet.  This card came from Flower Bug's Inkspot's Blog.  She has a nice Twelve Days of Christmas program where she will email you a project for 12 weeks.  This card is so gorgeous in person.  It is a very simple card but very elegant looking.  The white satin bow just finishes it off.  So if you are interested in attending the card buffet, please contact me by Tuesday.  I will be cutting Tuesday yet so I will still be able to fit a few more people in.


I just had to add this one last picture.  I took this picture last night when he was trying to help Grandpop put the lights on the tree.  I think this is going to be a very tiring Christmas trying to keep him away from the tree and all my decorations. He wants to be involved in EVERYTHING!  When we put the first tree up the day before, he crawled into the living room, sat down in front of the tree and said "Oh wow".   HE is turning one in 2 weeks and I know that this is going to be a Very Merry Christmas this year!  Enjoy the day!

Saturday, November 26, 2011

Last Chance Card Buffet card

Here is another card that I will be offering at my Last Chance Buffet.  This card has a definite country look and I love it.  I think it is my favorite card but it isn't for everybody.  That is why I am trying to give you a choice of a variety of cards at this event.  This is another quick and easy card which is what everybody needs at this time of the year.  Cards that are quick to make because we are all so busy shopping, baking, putting up our holiday decorations and the list goes on.


I still have room for this event which will be at my house on Wednesday at 6 PM.  Please contact me as soon as you can so that I have all your supplies prepared.  Just email me or call to let me know if you plan on attending.  


I went Door Busting yesterday and got some great deals and I am almost finished with my shopping.  Got all my cookie doughs mixed (10 different kinds) so I can start baking when I have the time.  So I had a good day.  Today the decorations go up and we are going to get our tree. Busy, Busy, day.   Enjoy your day!

Thursday, November 24, 2011

HAPPY THANKSGIVING

Happy Thanksgiving to all of you from my little turkey!  This is his first Thanksgiving and he really enjoyed it!  You enjoy your day!

Tuesday, November 22, 2011

Penguins and Snowflakes

My daughter wanted me to come up with a card for my Grandson's first birthday.  He was a penguin for Halloween and since his birthday is in December, my daughter wanted a card that included a penguin.  So this was one of the cards that was not chosen.  The supplies that I used for this card were:


STAMP SET:  Polar Party
PAPER:  Whisper White, Pool Party, Silver Glimmer Paper, Island Indigo
INK:  Whisper White Craft Ink, Black Staz-On
ACCESSORIES:  Snowflake Sizzix Die, Scallop Circle Punch, 1-1/4" Punch, 1-3/8:" Circle Punch, Snowburst Embossing Folder, Big Shot, Dazzling Diamonds, 2 Way Glue, Dimensionals, Sponges


There is no sentiment on this card yet because I am still trying to think what I am going to use it for.  I could use it for his birthday card or even use it for a Christmas card.  That is the great thing about making your own cards, you get to choose the sentiment for what you make.  So many times I have found the perfect card but the sentiment did not fit the occasion.  When I make my own, they are created exactly for the person or people I want to send them to.


Another busy day, Dr.'s appointment for Dad, cleaning the house for Thanksgiving, baking 2 Holiday Pies and if I have time I will be working on the Wedding Invitations.  Enjoy your day!

Sunday, November 20, 2011

Isn't this adorable?  I saw it on Stampers Showcase a few weeks ago and thought this was a great way to give a treat to someone a small Christmas treat.  I do not remember who made this but if you contact me, I would love to give you credit. Just by adding a cute wrapping lets the person know that you care about them because you took that extra step to make it special.  It uses the Two Tag Sizzex Die to make the Reindeer's body and then assorted punches to make the eyes and nose.  You can use a little ribbon and I added one of the Jingle Bells form the Holiday Mini to finish off the reindeer.  Just add 2 candy canes for the antlers and there you have a cute Reindeer wrapping for your candy treat.


We will be making this at my Last Chance Card Buffet on November 30.  If you are interested in attending, please contact me.  Enjoy the day!

Friday, November 18, 2011

Last Chance Card Buffet

I am trying something new this year before the Holidays. I decided to offer my customers one last chance to make a few cards if they need a couple yet. So I am offering a Last Chance Card Buffet with 4 cards and a quick project for my customers to choose from. The way that I am running my card buffet is to offer you 5 choices and you get to choose which projects you want to work on and how many cards you want to make of each. What a great opportunity to make a few more cards for those people you might have forgotten that are on your list.

This is one of the cards that I am offering at my card buffet. This card was designed by my friend Susan. So many of my customers saw it and fell in love with it and asked if we could make it. So I asked her if it was alright if I included it in my card buffet event. My customers were so happy that I was able to offer them this card at my event.

This card features the stamp set "Polar Party" and the DSP "Frostwood Lodge". I think the combination is stunning. I have a feeling that this is a card that people will make a lot of.

If you would like to make this card along with other choices, I will be offering the Last Chance Card Buffet on Wednesday November 30 @ 6 PM at my place. Contact me if you are interested. Enjoy the day!

Thursday, November 17, 2011

November Technique Class- Card 3

This is the last project that we will make at this month's Technique Class. This is a gift card holder and it is sooooo cute. This is a complete CASE from Lisa Young. I saw this last year on her blog and knew that I would have to make it sometime. Each year at my November Technique Class, I always make a gift card holder. I do it because I think people are always looking for new and creative ways to give gift cards.

The gift card slips into the package that the snowman is holding. What a cute way to give a gift card to someone!

There is one technique class left and I still have room. It will be held on Saturday November 26 @ 9 AM. Please contact me if you wish to attend. Enjoy the day!


Monday, November 14, 2011

A Valentine Swap

On Saturday I attended a stamping event with a group of demonstrators from another downline group. It was nice to get away for the day and not have to worry about anything. It was also nice to get together with demonstrators from other groups and see what they are doing with their customers. It really does help to rejuvenate you.

At this event, we were asked to bring a Valentine swap. Here is my swap. Does it look familiar? It should because I just switched colors and the sentiment from the bridal shower invitations I designed. I was so worn out from everyone having that virus the week before I just could not find the energy or the time to come up with a new idea. So I recycled the layout and changed up colors and sentiment and voila - a new card!

The supplies that I used for this card were:

STAMP SETS: Delightful Dozen
PAPER: Real Red, Basic Black, Whisper White
INK: Real Red Craft Ink
ACCESSORIES: Versamark, Clear EP, Heating Tool, Basic Black Satin Ribbon, Rhinestone Jewels, Vintage Wallpaper Embossing Folder, Designer Frames, Small Heart Punch, Dimensionals

The women on Saturday seemed to really like my swap. This just shows you that you do not need to come up with brand new ideas all the time. You can take a familiar layout and change papers, DSP, stamp sets, or embellishments and you get a card with a whole new look. Go out and enjoy the day!

Sunday, November 13, 2011

November Technique Class- Card 2

This is the second card that we will be working on in this month's "CHRISTMAS " themed technique classes. This card uses a special fold to create the Christmas Tree. I will be showing you how to create the tree. The Dazzling Details from the Holiday Mini are used in this card to add a little pizazz to the card. Although this card looks like it would take a long time to create, it is a very easy card to make a large number of. If you are interested in attending any of my Technique Classes, the following are the dates and times:

November 15-Tuesday @ 9:15- 11:45 AM
November 16- Wednesday @ 7-9:30 PM
November 26- Saturday @ 9- 11:30 AM

If you would like to attend, please contact me.

Enjoy the day!


Friday, November 11, 2011

November Technique Class- Card 1

I really should have had these posted last week already but with everybody ill with that virus, I did not have time to make the cards. The designs were always in my head but just did not have the time nor did I feel good enough to stamp. So today I am posting the first of the 3 cards that we are making this month. The theme for my cards this month is "CHRISTMAS". A lot of blogs have been showing the tree done in a three dimensional way. So I decided to make one also for one of the cards this month. I think adding the Silver Glimmer paper really makes this card pop. I love it!

Here are the dates and times:
November 15-Tuesday @ 9:15- 11:45 AM
November 16- Wednesday @ 7-9:30 PM
November 26- Saturday @ 9- 11:30 AM

Please contact me if you are interested in attending.

Enjoy the day!

Tuesday, November 8, 2011

A Polar Party Birthday

Eli's first birthday is coming soon. So of course Grandma had to make the birthday invites. Since Eli was a Penguin for Halloween and his birthday is in December, I thought using the stamp set "Polar Party" would be perfect. Of course I had to add some accessories from other stamp sets to give it a more birthday feeling. I used the balloon from "Beary Best Friends" and I created the pennant from the Petal Cone Die and the sentiment came from "On Your Birthday". The design on the balloon came from the retired DSP "Celebrations". I still had some scraps around and thought this was the perfect place to use it. The supplies that I used for this card were:

STAMP SETS" Polar Party, Beary Best Friends, On Your Birthday
PAPER: Whisper White, Bashful Blue, Pacific Point. Celebrations DSP(RETIRED)
INK: Bashful Blue, Pacific Point, Basic Black
ACCESSORIES: Petal Cone Die, Big Shot, Dazzling Details. Colored Pencils, Basic Gray Marker, Scallop Circle Punch, Sponges

I think it is cute and whimsical and perfect for a 1 year old little boy. I am a little behind in my project making due to last week's "War of the Virus". I was out of stamping commission for a week. I can't say everyone is over it because last night I got a text message from my other daughter who told us that the virus has now hit her place. How could one little 10 month old spread so many germs! Well I am off to run all the errands that I could not get done last week. Enjoy your day!

Friday, November 4, 2011

An Oldie But Goodie

This is a swap card that I made last year for a group swap. I did not come up with anything new this week because we have ALL been sick. Eli started with an intestinal virus and he infected everyone, my Dad, my husband, his mom and dad and finally me. All week I have been taking care of sick people and it finally caught up with me. I felt I needed to post something so I brought this card back from last year. The supplies that I used for this card were:

STAMP SETS: Day of Gratitude, French Foliage
PAPER: Whisper White, More Mustard, Cajun Craze, Old Olive
INK: Soft Suede, More Mustard, Old Olive, Cajun Craze
ACCESSORIES: Linen Thread, Regal Buttons, Dimensionals, Square Lattice Embossing Folder, Big Shot

I hope you enjoyed the card. Hopefully this weekend I will feel better and so will everybody else. The poor little guy did not even get a chance to Trick or Treat because he was so sick. He still is not himself but he is getting better everyday. If I feel good enough I will have something new to show you on Monday. Enjoy the day and keep well!

Tuesday, November 1, 2011

It's Good To Be a Hostess Promotion


There is a great new promotion that Stampin' Up is offering starting today and ending on December 15. If you hostess a workshop from November 1- December 15 which totals $350 or more you receive an extra $35 in Stampin' Up products. Check out what benefits you will be able to receive during this time period. Now would be a great time to book a workshop and get some great ideas for the Holidays.

If you are interested in booking a workshop during this time please contact me.


IT'S GOOD TO BE THE HOSTESS PROMOTION

Dates: November 1-December 15, 2011

Details
Hostesses will receive an additional $35 in free Stampin' Up! products when they hold a workshop totaling $350 or more (excluding tax and shipping)! This is in addition to all the other benefits they already get as a Stampin' Up! hostess.

If your hostess' workshop sales total is

Your hostess earns hostess dollars

It's Good to Be the Hostess

Total Free Stampin' Up! Merchandise

Plus, hostesses earn full-priced items at 50% off

$350

$50

+

$35

$85

---

$400

$65

+

$35

$100

1 item

$500

$80

+

$35

$115

2 items

$750

$120

+

$35

$155

3 items

$1,000+

$160 plus 15% of amount over $1,000

+

$35

$195 plus 15% of amount over $1,000

4 items


Monday, October 31, 2011

Wishing You a Happy Halloween

I am wishing you a Happy Halloween today with a picture of Eli and the pumpkin his mother carved for him Friday night. He seems to like it! He had a good time watching her carve the pumpkin for him and even more fun trying eat the pieces that were carved out. After she was done carving the pumpkin and put it on his highchair, he started to kiss the pumpkin. I guess that was his way of saying he liked it.

This will be his first Halloween and if he is feeling better, they will go Trick or Treating to a few of the neighbor's houses. Just the friends and family houses.

Happy Halloween and enjoy the day!

Friday, October 28, 2011

Happy Halloween!

This was one of the cards that we made at my Halloween Gathering. I this is a CASE but I don't remember who the person was. Sorry I could not find a watermark with a name. But I thought it was a quick and easy card to make for a card buffet. The supplies that I used for this card were:

STAMP SET: Haunted Forest
PAPER: Basic Gray, Basic Black, Whisper White, Frightful Sight DSP
INK: Staz On Black
ACCESSORIES: 1/2" Scallop Dots Old Olive Ribbon, Colored Pencils, Blender Pens

Just wanted to post something very quickly. I have Eli today and I will be busy chasing after him. Enjoy the day!

Thursday, October 27, 2011

Halloween Treats for Eli

Well the treats aren't really for Eli but for his teachers at Day Care. I made sugar cookies and I used the new Cookie Stamp that SU came out with the beginning of this month. Then I found a great idea for a box to hold cookies from Kris Sobolik. I decorated each box differently by using the Frightful Sight DSP and a variety of ribbons. The supplies that I used for this project were:

STAMP SET: Wicked Cool
PAPER: Frightful Sight DSP, Basic Black
INK: Basic Gray, Tangerine Tango
ACCESSORIES: Cello Bags, Scallop Circle Punch, 1/4" Pumpkin Pie Grosgrain Ribbon, Basic Black Satin Ribbon, Old Olive Satin Ribbon, 1/2" Scallop Dots Basic Black Ribbon, 1-3/8" Circle Punch, Sticky Strip, Simply Scored Scoring Tool, Dimensionals

I think they are a great way to make a small treat look like you cared enough about the person to spend extra time to make a great presentation. I just put the cookies in one of our cello bags and tied it up with different ribbons. I hope the teachers at daycare like them. He is giving the packages to them today. He will not be there tomorrow when they have there Halloween dress-up and parade. Enjoy the day!


Monday, October 24, 2011

An Adorable Angel

This weekend, a couple of friends and myself drove about 2 hours to attend an event held by another SU Demonstrator, Janet Wakeland. This is a picture of one of the projects I made this weekend at the event. How cute is this! The legs are made using our new cello bags. We put the Mica Flakes inside instead of a treat. This adds a lot more glitz to the project. If you look very closely to the angel's dress, you will see that we used an embossing folder to add some texture to the dress.

For this project we used the following supplies:

STAMP SETS: None
PAPER: Whisper White, So Saffron, Blushing Bride
INK: None
ACCESSORIES: Silver Glimmer Paper, Embossing Folder, Big Shot, Mica Flakes, 1-3/4" Circle Punch 1-3/8"Circle Punch, 1-1/4"Circle Punch, 1" Circle Punch, Heart to Heart Punch, Adhesive, 1 x 8" Cellophane Bags

I loved all the projects that we did there. It is really good to see how another demonstrator presents their projects. It gives you more ideas, presentation ideas, and really can help you grow as a demo. It was a wonderful learning experience. Enjoy the day!


Friday, October 21, 2011

A Black and Ivory Favor Box

Well I am still working on this huge wedding project. I think these will be the favor boxes for the bridal shower. I have been told that the boxes will be filled with homemade Truffles. How yummy does that sound? I wanted something that looked elegant so I embossed the image on the black card stock with black embossing powder. It is very subtle but very elegant looking. I used the Very Vanilla Satin Ribbon to complete the favor box. Although it is very simple, when they are placed at everyone's place, I think it will look fantastic. The supplies that I used for this project was:

STAMP: Wedding Sweet
PAPER: Basic Black 12" x 12"
INK: Versamark
ACCESSORIES: Very Vanilla Satin Ribbon, Pearls, Sticky Strip, Small Circle Punch, Favor Box Sizzix Die, Big Shot

I do not think this shows up in a picture as nice as it looks in person. I will post more pictures of these favor boxes later when they are placed around the table at the shower. I am now off to work on the Wedding Invitations. That is the last project for the wedding unless I am asked to make favors for the wedding. Enjoy the day!

Thursday, October 20, 2011

Twisted Easel Card

This is one of the cards that we made this month at my Technique Classes. I usually try to post these samples before the class but it has not been easy the last few weeks. This has been a very busy for me and I am still trying to get into a routine since we are now watching my grandson a couple of times during the week. So please be patient until I can work out a routine.

I really love this the "Day of Gratitude" stamp set. When I first saw it , I was not that excited. But the more I use it, I absolutely love it! The supplies that I used for this card was"

STAMP: Day of Gratitude
PAPER: Old Olive, Cajun Craze, Very Vanilla, Soft Suede
INK: Cajun Craze, Early Espresso
ACCESSORIES: Chantilly Lace, Vintage Brads, Scallop Border Punch, Decorative Label Punch, Dimensionals, Vintage Wallpaper Embossing Folder, Sponges, Big Shot

I like to use different folds when doing cards. I think it adds more interest to a card. Well back to the grindstone. I am going to work on the favor boxes today for that wedding I am working on. When I get them finished, I will show you what I came up with. Enjoy your day!

Monday, October 17, 2011

A Simple Thank You

I think that this is the most simple card that I have ever done. This is another of the projects that I am working on for an upcoming wedding that I was asked to work on. The bride to be is a person who likes simple, clean, and elegant. And I think this thank you card its that description. I used the single Elegant Thank You stamp found in the SU catalog. The supplies that I used for this card were:

STAMPS: Elegant Thank You
PAPER: Very Vanilla, Basic Black
INK: Versamark
ACCESSORIES: Black Embossing Powder, Heating Tool

I think what helps this card look more elegant is the sentiment is embossed in black. The flourish around the sentiment also creates a more elegant feeling. I am convinced this person will be pleased because it will fit in with the feeling for the wedding that she is going for. I can't wait to see everything together. I think it will look great! Enjoy the day!

Saturday, October 15, 2011


I did not post yesterday because my oldest daughter and I took Eli to Peddlers Village to see the scarecrows. Every Fall they have a contest for the public to create different scarecrows and they display them all over the area. It is so much to see and overwhelming especially if you are only 10 months old. But Eli was a trooper and we had a great time together. My oldest daughter is Eli's godmother and we thought it would be a nice family outing. And it was! But I do think he will enjoy it more next year when he is a little older. I am going to share some pictures of the different scarecrows that people created for this event.

Wednesday, October 12, 2011

A Wonderful Surprise

Yesterday when I went to my mailbox, I found this card. It is a card from my Upline congratulating me on being in her top five of sales for the month of September. What a pleasant surprise and what a great card. This card uses the owl stamp from the Hostess set "Warmest of Wishes". The supplies used for this card were:

STAMP SET: Wicked Cool, Warmest of Wishes
PAPER: Whisper White, Basic Black, Pumpkin Pie
INK: Basic Black
ACCESSORIES: Dimensionals, Owl Builder Punch, 2-1/2" Circle Punch, 1" Circle Punch, Pumpkin Pie Marker, Web Embossing Folder, Big Shot

With so much going on in my life right now, it was a pleasant surprise to get this card. It is overcast here today and they are calling for rain... again. We are just hoping that it is not a hard rain and it does not last long. We just got the basement dry and the last thing we need is a lot of rain and have the basement fill up with water again. Enjoy your day!

Monday, October 10, 2011

A Quick Card

Yesterday my daughter called to finalize details for me watching Eli while they went to a wedding in New Jersey. So at the end of the conversation she says, "Oh by the way, can you make me a wedding card? I forgot to buy one." Okay...I did not have much time and had to think fast of what I could make that looked elegant. I pulled out my Manhatten Flower Embossing folder which I had not used for a while and started to work. The supplies that I used for this card were:

STAMPS: Wedding Sweet, Full of Life ( inside sentiment )
PAPER: Brushed Silver, Whisper White
INK: Versamark
ACCESSORIES: Manhattan Flower Embossing Folder, 5/8" Organza Ribbon, Silver Embossing Powder , Dazzling Details

When I was finished embossing and put the card together. It seemed a little bland. So I took the Dazzling Details and went over all the raised lines with it. That little sparkle made the card look spectacular! I know they will love this card. Although there is minimal color, the Dazzling Details and the silver embossing is what really makes this card stunning. I wish you could see it in person, it really does look so much nicer.

I have a lot to do today. I have Eli for the day but I have to go to a funeral and then late afternoon I am having a Halloween Gathering. Will tell you more about that tomorrow.

Enjoy the day!

Sunday, October 9, 2011

Welcome Christmas

This is one of the cards that we are making at this month's Stamp A Stack. I think this is going to be one of my Christmas cards this year. My husband thinks that Christmas cards should only be red and green. When he saw this card he said that these would be great to send out this year. So I ordered everything I need to make them, I just need to find the time now. The supplies used for this card are:

STAMP SETS: Polar Party, Heard from the Heart
PAPER: Real Red, Lucky Limeade, Whisper White
INK: Black Staz On, Real Red, Soft Suede, Lucky Limeade, Daffodil Delight
ACCESSORIES: Dazzling Details, Rhinestone Jewels, Blender Pens, Yellow Sharpie (non SU ), Dimensionals, Scallop Trim Border Punch, Snowburst Embossing Folder, 3" Circle Sizzix Die, Big Shot

I used the Sharpie to color the Rhinestones so they are the same color as the stars on top of the trees. I used the Dazzling Details to add the snow to the ground and on the trees. I hope the people that receive this card love it as much as I do.

I am still working hard on that wedding order. Last night I finished the Save the Date cards and now I am working on the favors. Wow, this wedding is keeping me busy! But I know that in the end they will love what I made and that makes it all worth while. Enjoy the day!

Thursday, October 6, 2011

Bridal Shower Favor


Well I am a little late with my posting today. This morning I was out for breakfast with people who retired from the school I used to teach at. It was so nice to sit and catch up with everything that has been going on in our lives.
I had a wonderful time!

Anyway I have been working hard on an order that I received for making a lot of items for an up coming wedding. This is a an idea for a bridal shower favor. I only used Basic Black and Very Vanilla because that is the color scheme for the wedding. As I said before, I think it will look very elegant when everything comes together. I thought an elegant memo pad would be a favor. There is a little bit more they want for favors but that will be shown at a later time. So I stayed with the black and vanilla colors , but used the Vintage Wallpaper embossing folder on the top layer to convey an elegant look. The pearls just accent the piece. I think the attendees for this event will like them.

When I have everything done, I will take a picture of the whole set together. I really think all together it will look striking! I can't wait to show you everything done. I am now going to cut the rest of the card stock and start to put them together. I need to get all of these things done before the holidays because I know if I wait then I will be on overload trying to get everything done. Enjoy the day!